Basic Settings
Overview
This page explains the basic settings of AITuberKit. For configuration using environment variables, please see Environment Variables.
Language Settings
Environment Variables:
# Default language setting (specify one of the following values)
# ja: Japanese, en: English, ko: Korean, zh-CN: Chinese (Simplified), zh-TW: Chinese (Traditional), vi: Vietnamese
# fr: French, es: Spanish, pt: Portuguese, de: German
# ru: Russian, it: Italian, ar: Arabic, hi: Hindi, pl: Polish, th: Thai
NEXT_PUBLIC_SELECT_LANGUAGE=en
AITuberKit supports multiple languages, and you can choose from the following:
- Arabic
- English
- French
- German
- Hindi
- Italian
- Japanese
- Korean
- Polish
- Portuguese
- Russian
- Simplified Chinese
- Spanish
- Thai
- Traditional Chinese
- Vietnamese
Note
If you select a language other than Japanese and have a Japanese-only voice service (VOICEVOX, KOEIROMAP, AivisSpeech, Aivis Cloud API) selected, it will automatically switch to Google Text-to-Speech.
Site URL
Set the base URL used for image URLs in OGP (Open Graph Protocol) and Twitter cards. This ensures that preview images are displayed correctly when the site is shared on social media.
Environment Variables:
# Site URL (used for OGP and Twitter card image URLs)
NEXT_PUBLIC_SITE_URL="https://aituberkit.com"
English Word Pronunciation Setting
You can set whether to pronounce English words in Japanese.
TIP
This setting is only displayed when Japanese is selected.
Environment Variables:
# English word pronunciation setting (true/false)
NEXT_PUBLIC_CHANGE_ENGLISH_TO_JAPANESE=false
Restricted Mode
When restricted mode is enabled, write operations such as file uploads, deletions, and updates are disabled. Use this for deployment to serverless environments like Cloudflare or for use on demo terminals.
Environment Variables:
# Enable/disable restricted mode (true/false)
NEXT_PUBLIC_RESTRICTED_MODE="false"
For details on restricted features, see Restricted Mode.
Demo Display and Subpath Deployment
Enable NEXT_PUBLIC_DEMO_MODE to display notices for demo users on the introduction and settings screens. From v2.78.0, it also disables GPT-Live, the Realtime API, audio mode, and OpenAI TTS. If OpenAI TTS was selected, the voice engine switches to Aivis Cloud API. This is a display setting and is separate from the API access control setting AITUBERKIT_SERVER_SECRET_ACCESS_MODE="demo".
When deploying under a subpath, such as on GitHub Pages, set NEXT_PUBLIC_BASE_PATH to the base path including the leading /.
Environment Variables:
# Enable/disable demo mode (true/false)
# When enabled, GPT-Live, the Realtime API, audio mode, and OpenAI TTS are disabled
NEXT_PUBLIC_DEMO_MODE="false"

# Base path for subpath deployment (e.g. /aituber-kit)
NEXT_PUBLIC_BASE_PATH=""
Live2D Features
Toggle the Live2D feature on or off. A license agreement with Live2D Inc. is required to use the Live2D feature. It is disabled by default.
Environment Variables:
# Enable/disable Live2D feature (true/false)
NEXT_PUBLIC_LIVE2D_ENABLED="false"
Note
A license agreement with Live2D Inc. is required to use the Live2D feature. Commercial use without a license agreement is not permitted.
Background Image Settings
Environment Variables:
# Background image path
NEXT_PUBLIC_BACKGROUND_IMAGE_PATH=/backgrounds/bg-c.png
You can customize the background image of the application. Click the "Upload Background Image" button to upload your preferred image.
Once uploaded, the image can be selected from the settings screen at any time.
The background selected on the settings screen, including a green screen, is saved in your browser and remains selected after you reload the page. The selected background is included in settings backups, but the uploaded image file itself is not. When moving your settings to another environment, transfer the image file separately as well.
You can also specify the default background image using an environment variable.
TIP
You can also select a green screen. When setting via environment variables, specify green.
Show Answer Box
You can set whether to display the AI's response text on the screen when the conversation history is not displayed.
Environment Variables:
# Answer box display setting (true/false)
NEXT_PUBLIC_SHOW_ASSISTANT_TEXT=true

# Answer box style (bubble: glass bubble, borderless: borderless subtitle style)
NEXT_PUBLIC_ASSISTANT_TEXT_STYLE="borderless"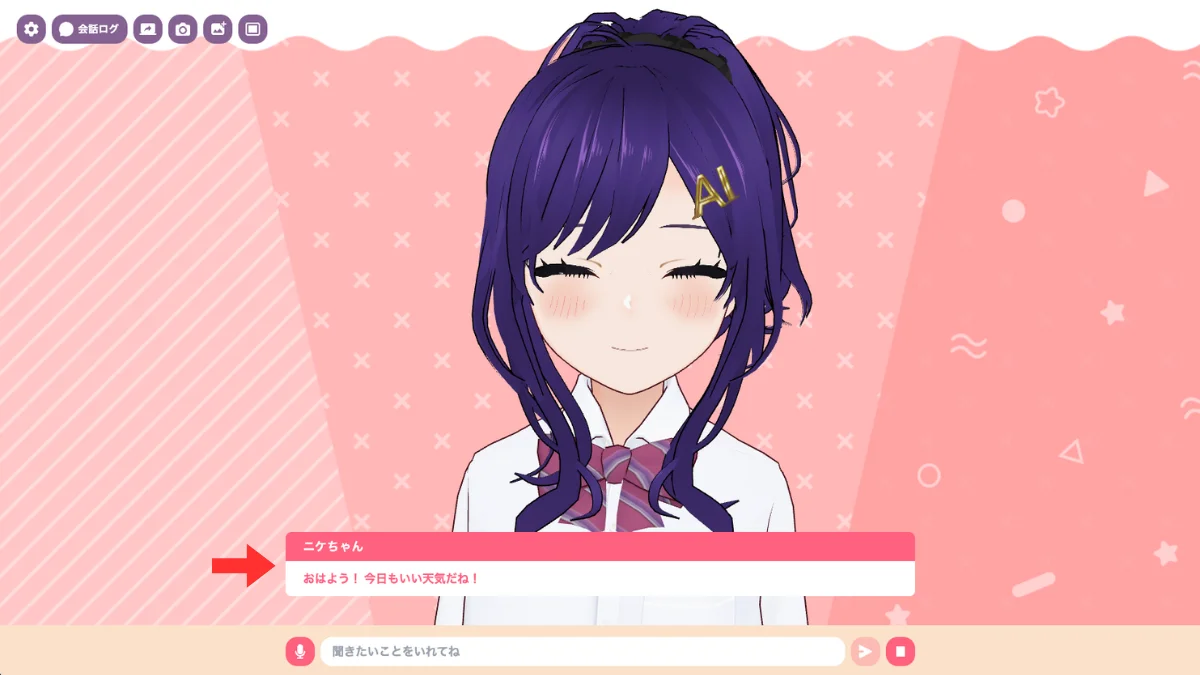
When the answer box is displayed, you can choose between a glass bubble and a borderless subtitle style.
Conversation Display Mode
You can choose from the following three display modes for conversations on the screen. Changes made with the conversation log button in the control panel are also saved.
- Answer Box: Displays the latest AI response on the screen
- Conversation Log: Displays the conversation history between the user and AI
- Hidden: Hides both the answer box and conversation log
Even when Answer Box is selected, response text is not shown if Show Answer Box above is disabled.
# Conversation display mode (assistant: answer box, chat-log: conversation log, hidden: hidden)
NEXT_PUBLIC_CHAT_LOG_MODE="assistant"
Conversation Log Design
You can configure the conversation log design and whether it appears on the left or right. Drag its outer edge to adjust the distance from the edge of the screen, or specify an initial value through environment variables.
# Chat log display position (left/right)
NEXT_PUBLIC_CHAT_LOG_POSITION="right"

# Chat log design (glass/classic)
NEXT_PUBLIC_CHAT_LOG_STYLE="classic"

# Distance from the edge of the screen (px; leave blank to use the design default)
NEXT_PUBLIC_CHAT_LOG_EDGE_OFFSET=
Show Character Name in Answer Box
You can set whether to display the character name in the answer box.
Environment Variables:
# Character name display setting (true/false)
NEXT_PUBLIC_SHOW_CHARACTER_NAME=true
Input Form Display
You can set whether to display the message input form at the bottom of the screen. If the application is operated only through an external API or voice input, you can hide the input form for a cleaner screen.
Environment Variables:
# Input form display setting (true/false)
NEXT_PUBLIC_SHOW_INPUT_FORM=true
Control Panel Display
You can set whether to display the control panel in the upper right corner of the screen.
Hint
The settings screen can also be displayed using the shortcut Cmd + . on Mac or Ctrl + . on Windows. If you are using a smartphone, you can also display it by long-pressing the top left corner of the screen (about 1 second).
Environment Variables:
# Control panel display setting (true/false)
NEXT_PUBLIC_SHOW_CONTROL_PANEL=true
Color Theme
You can select the color theme for the application. The selected theme will be applied immediately.
Search Engine Pages on the Official Site
Since v2.71.0, the official demo site provides an introduction page for search engines, a sitemap, robots.txt, and llms.txt. These are separate from the regular character conversation screen.
Official-Site-Only Pages (v2.72.0 and Later)
# Enable official-site-only SEO pages (keep false outside the official deployment)
NEXT_PUBLIC_OFFICIAL_SITE=false
When self-hosting, use the default value of false. Enable the official-site-specific SEO pages only in the official deployment.